Sorry for no posts, but I'm sick at the moment. Don't go away, back in a bit.
All better, incoming screenshots.
Friday, January 25
Thursday, January 24
Screenshots + Tutorial: 'A better one'
Hi, I redid my lights now and I found a better tutorial written by my friend AmishThunder who you may know from his map mp_subway, the first map because he cheated and got the beta editor. Boo!
Anyways.. quoted from AmishThunder, 'http://www.kramerartanddesign.com'
Lighting has changed for the better in COD4, I'll show you the basics then the best way to learn is to play!
First create your light.
Right click on the grid -> light
-----------------------------------------------------------------------
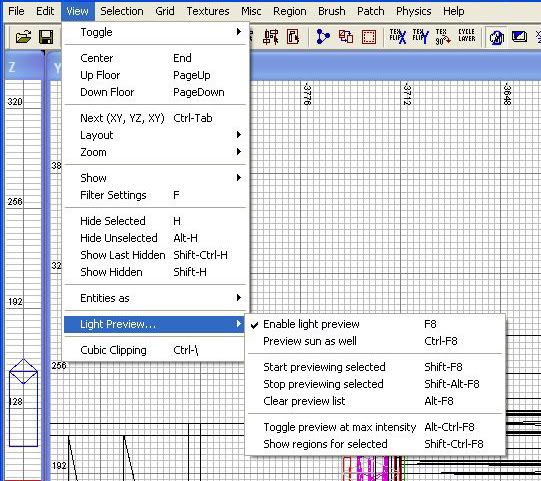
Check out the Preview options. Lets look at the most used items.
View -> Light Preview
Enable Light Preview - Enable if you want the preview when selecting lights.
Preview sun as well - Enables worldspawn settings to be rendered when light preview is active.
Toggle preview at max intensity - Turn on/off light falloff.
-----------------------------------------------------------------------
A Primary light is a dynamic light, it will cast shadow of all objects and reflect off surfaces in relation to the player. It is also a higher quality light than a non-primary.
Primary_omni - Regular light, 360 degree.
Primary_spot - Same as omni but a spot light, discussed below.
Primary_scriptable - Yes, lights can now be scripted.
Primary_noshadow - The light will not cast any shadows.
_color - press "k" to select your color for the light. Value is x/255 RGB.
def - Can be any of the following or anything you create in asset manager.
Candle, Florescent, light_dynamic, light_no_falloff, light_point_dark_edges, light_point_linear, light_linear_point_nocenter, light_point_quadratic, red_light, tungsten_lamp.
exponent - amount of falloff at edges.
fov_inner & fov_outer - range in degrees of light (spot)
radius - how large the light is in units.
-----------------------------------------------------------------------
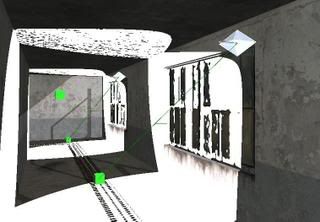
Now to use the light preview you must select a light that has already been placed in your map. Once selected your 3D preview should change.
For a projected light you will want to make a spot light, this is easy enough to create.
Make your light entity with the desired values.
Create a null object in front of the light.
Right click on the grid -> info -> null
The null doesn't need any values.
Now connect the two objects, your light and null.
Select your light.
Select your null while your light is selected.
Press "w" to connect, it must be done in this order.
You will know it has been successful when your light preview shows a more targeted light.
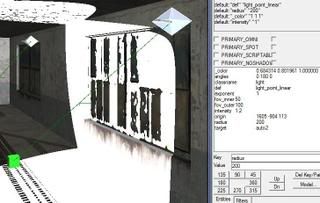
You may move the light and null individually to get your desired light.
Time spent on mapping as of now: 24 hours
Bye.
Anyways.. quoted from AmishThunder, 'http://www.kramerartanddesign.com'
Lighting has changed for the better in COD4, I'll show you the basics then the best way to learn is to play!
First create your light.
Right click on the grid -> light
-----------------------------------------------------------------------
Check out the Preview options. Lets look at the most used items.
View -> Light Preview
Enable Light Preview - Enable if you want the preview when selecting lights.
Preview sun as well - Enables worldspawn settings to be rendered when light preview is active.
Toggle preview at max intensity - Turn on/off light falloff.
-----------------------------------------------------------------------
A Primary light is a dynamic light, it will cast shadow of all objects and reflect off surfaces in relation to the player. It is also a higher quality light than a non-primary.
Primary_omni - Regular light, 360 degree.
Primary_spot - Same as omni but a spot light, discussed below.
Primary_scriptable - Yes, lights can now be scripted.
Primary_noshadow - The light will not cast any shadows.
_color - press "k" to select your color for the light. Value is x/255 RGB.
def - Can be any of the following or anything you create in asset manager.
Candle, Florescent, light_dynamic, light_no_falloff, light_point_dark_edges, light_point_linear, light_linear_point_nocenter, light_point_quadratic, red_light, tungsten_lamp.
exponent - amount of falloff at edges.
fov_inner & fov_outer - range in degrees of light (spot)
radius - how large the light is in units.
-----------------------------------------------------------------------
Now to use the light preview you must select a light that has already been placed in your map. Once selected your 3D preview should change.
For a projected light you will want to make a spot light, this is easy enough to create.
Make your light entity with the desired values.
Create a null object in front of the light.
Right click on the grid -> info -> null
The null doesn't need any values.
Now connect the two objects, your light and null.
Select your light.
Select your null while your light is selected.
Press "w" to connect, it must be done in this order.
You will know it has been successful when your light preview shows a more targeted light.
You may move the light and null individually to get your desired light.
Time spent on mapping as of now: 24 hours
Bye.
Tuesday, January 22
Screenshots: 'Up and down'


Made from scratch, there being no bend tool as far as I know won't stop me from making railings!
These stairs are pretty much the only thing in the whole map that is done. The garage is like, far from complete.
Bye.
Time spent on mapping as of now: 22 hours
Tutorial: 'Lights'
This is how you make lights and how to point them at things. To view how a light is working, press 'view' on the toolbar and go down to 'Light Preview...', then clicking 'Enable light preview'. [F8].
To have lights point things, first your best bet is to make a light with 'def = light_point_linear'.
Make an 'info_null' box by right-clicking anywhere on the grid and at 'info', press 'null'. Tiny green box will appear. Move this to the location where you want the light to have it's 'destination', as in where the light is headed. Click the previously mentioned light and shift+click the info_null. Press W to weld them. Now they're connected!
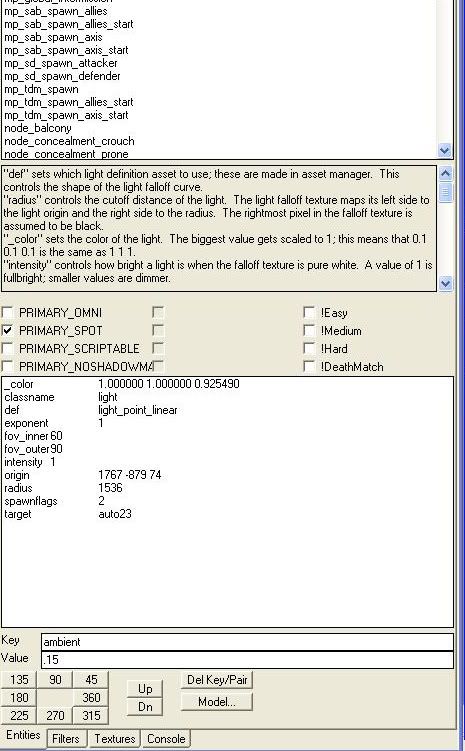
"def" sets which light definition asset to use; these are made in asset manager. This controls the shape of the light falloff curve.
Useable definition settings:
'candle'
'florescent'
'light_dynamic'
'light_no_falloff'
'light_point_dark_edges'
'light_point_linear'
'light_point_linear_nocenter'
'light_point_quadratic'
'red_light'
'tungsten_lamp'
"radius" controls the cutoff distance of the light. The light falloff texture maps its left side to the light origin and the right side to the radius. The rightmost pixel in the falloff texture is assumed to be black.
"_color" sets the color of the light. The biggest value gets scaled to 1; this means that 0.1 0.1 0.1 is the same as 1 1 1.
"intensity" controls how bright a light is when the falloff texture is pure white. A value of 1 is fullbright; smaller values are dimmer.
"PRIMARY_OMNI" and "PRIMARY_SPOT", if checked, give the light higher quality lighting and dynamic shadows. Only one primary light may affect each world surface. They both require spotlight settings to control where dynamic shadows lie, but unlike normal spotlights, "PRIMARY_OMNI" lights do not get attenuated by angle from the spot direction.
"PRIMARY_SCRIPTABLE" makes a primary light show up as an entity to script.
"PRIMARY_NOSHADOWMAP" prevents a primary light from ever having a shadowmap. This is implied by fov_outer > 120.
A light pointed at a target will be a spotlight facing the target. They default to having a circle with 64 unit radius around the target.
"fov_outer" overrides the fov of a spotlight from the 64 unit circle around the target. It is in degrees. A value of 90 would go +/-45 degrees from center, for 90 degrees total. The default is to use the target to set the fov.
"fov_inner" sets the fov of the inner cone. Spotlights only fade with angle between fov_inner and fov_outer. Fov_inner is the same units as fov_outer; it should always be less than fov_outer. The default is 0.
"exponent" changes the falloff of the spotlight between "fov_inner" and "fov_outer". The default value of 0 means there is no falloff. A value of 1 gives linear falloff. Higher integers give steeper falloffs.
Hope that helped.
Bye.
Monday, January 21
Screenshots: 'Lighting'
First time I'm using lights, and they look pretty good I guess, tad dull and a bit too warm. I'm going to try and get rays of light aswell, going to see how your supposed to do that effect. Once I know, I'll post it.
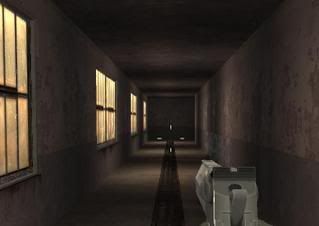
Bye!
Time spent on mapping as of now: 18 hours

Bye!
Time spent on mapping as of now: 18 hours
Sunday, January 20
Screenshots: 'More of the same?'
It may seem like kind of the same, but I did do a lot of detailing work and more lights. These lights are all wired, which is all very detailed but I didn't make screenshots of it for reasons unknown.
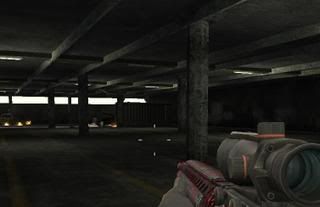

I'll promise you people something new to see than this old garage. Maybe even an 'ooh' would be good on what I'm going to make next. Tune in .. tonight/tommorow!
Bye!
Time spent on mapping as of now: 16 hours


I'll promise you people something new to see than this old garage. Maybe even an 'ooh' would be good on what I'm going to make next. Tune in .. tonight/tommorow!
Bye!
Time spent on mapping as of now: 16 hours
Info: 'Question & Answer'
Hey,
From now on, I'll be doing a question & answer session about CoD4 Radiant mapping every day at 1500 hours, GMT. Suggestions are welcome too. Ask by means of commenting.
Will last for about 30 - 60 minutes.
Fire away.
New compiled screenshots in 10 minutes.
From now on, I'll be doing a question & answer session about CoD4 Radiant mapping every day at 1500 hours, GMT. Suggestions are welcome too. Ask by means of commenting.
Will last for about 30 - 60 minutes.
Fire away.
New compiled screenshots in 10 minutes.
Tutorials + Screenshots: 'After another two hours..'
I'm now compiling my first version of my map, and I'll write this while I'm doing it so I'll edit in pictures soon. I've learned a few things.
Info-box 1:
Clicking on 'view' in the tool bar, drop down to 'Light Preview...' and click Enable light preview (F8), which I think is already enabled, and the new stuff that is Preview sun light aswell, which is just awesome because I can now see how my sun direction is changing in real time. Look:
_color .8 .9 1
ambient .1
bouncefraction .7
contrastGain 0.425
diffusefraction 0.5
suncolor 1 0.92 .88
sundiffusecolor .9 .88 .75
sundirection -50 -20 0
sunlight 0.9
Using these worldspawn settings, I got this first:
Then, changing sunlight to 1.6 and sundirection to -50 -80 0, I got this!
Sweet huh?
Info-box 2:
While compiling I first got these errors 100-fold:
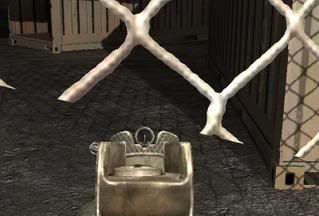
"C:\Program Files (x86)\Activision\Call of Duty 4 - Modern Warfare\map_source\mp_carpark.map" 0 334 -46.5 -1576 58.1429 0 -1 -0 "surface 'me_fence_chainlink' is partially floating or needs to be aligned"
"C:\Program Files (x86)\Activision\Call of Duty 4 - Modern Warfare\map_source\mp_carpark.map" 0 334 -64 -1576 56 0 -1 -0 "surface 'me_fence_chainlink' is partially floating or needs to be aligned",
which, on a side note, is presented in an ERRLOG file created while compiling, nifty.
I fixed this by going to 'Textures' on the toolbar, then to 'Edit Layer' and finally 'Lightmap'. Press I, selecting everything and press S, the surface inspector. Click on LMAP, then save. The error should now be removed! Cool.
Info-box 3:
This is awesome, while checking out backlot for some other cool stuff, I noticed how they did the HDR bloom, where you get a lot of blinding white light at some points, theming a hard sunlight which you see from a distance. To do this, simply make a patch on the area you want 'lightened', and give it the texture HFD. Make sure you make it face the right way or else a dark corner will suddenly breathe light!
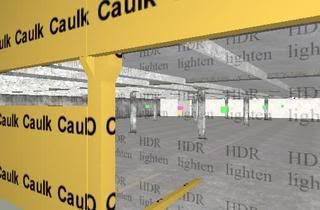
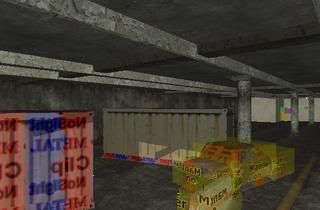
On a lighter note (pun), here's some detailing I did.
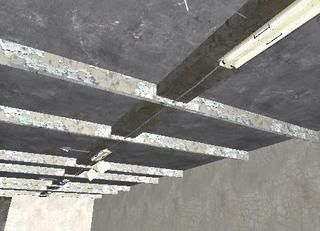
Screenshots after compile:
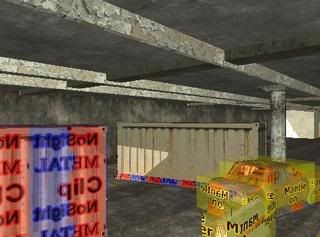
Same part, different view.
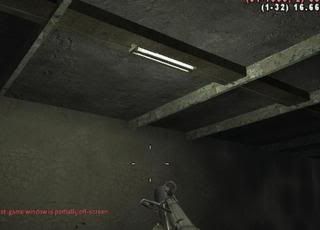
Now for the HDR we were talking about, it works, but you can't really see it because there's no background, but here's something, this is the skybox, kind of greyish.
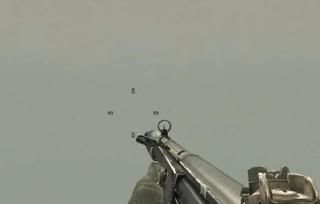
And here is when I walk back a bit:
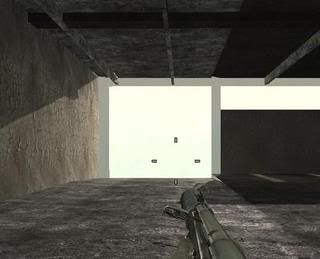
Ooh. Aah. Ooo.
I love that lighting! Going to fill the garage with lights, so tune in next time (about in 8 hours or so, because I'm going to do something else now)
Bye!
Time spent on mapping as of now: 14 hours
Info-box 1:
Clicking on 'view' in the tool bar, drop down to 'Light Preview...' and click Enable light preview (F8), which I think is already enabled, and the new stuff that is Preview sun light aswell, which is just awesome because I can now see how my sun direction is changing in real time. Look:
_color .8 .9 1
ambient .1
bouncefraction .7
contrastGain 0.425
diffusefraction 0.5
suncolor 1 0.92 .88
sundiffusecolor .9 .88 .75
sundirection -50 -20 0
sunlight 0.9
Using these worldspawn settings, I got this first:

Then, changing sunlight to 1.6 and sundirection to -50 -80 0, I got this!

Sweet huh?
Info-box 2:
While compiling I first got these errors 100-fold:
"C:\Program Files (x86)\Activision\Call of Duty 4 - Modern Warfare\map_source\mp_carpark.map" 0 334 -46.5 -1576 58.1429 0 -1 -0 "surface 'me_fence_chainlink' is partially floating or needs to be aligned"
"C:\Program Files (x86)\Activision\Call of Duty 4 - Modern Warfare\map_source\mp_carpark.map" 0 334 -64 -1576 56 0 -1 -0 "surface 'me_fence_chainlink' is partially floating or needs to be aligned",
which, on a side note, is presented in an ERRLOG file created while compiling, nifty.
I fixed this by going to 'Textures' on the toolbar, then to 'Edit Layer' and finally 'Lightmap'. Press I, selecting everything and press S, the surface inspector. Click on LMAP, then save. The error should now be removed! Cool.
Info-box 3:
This is awesome, while checking out backlot for some other cool stuff, I noticed how they did the HDR bloom, where you get a lot of blinding white light at some points, theming a hard sunlight which you see from a distance. To do this, simply make a patch on the area you want 'lightened', and give it the texture HFD. Make sure you make it face the right way or else a dark corner will suddenly breathe light!

On a lighter note (pun), here's some detailing I did.

Screenshots after compile:
Same part, different view.

Now for the HDR we were talking about, it works, but you can't really see it because there's no background, but here's something, this is the skybox, kind of greyish.

And here is when I walk back a bit:

Ooh. Aah. Ooo.

I love that lighting! Going to fill the garage with lights, so tune in next time (about in 8 hours or so, because I'm going to do something else now)
Bye!
Time spent on mapping as of now: 14 hours
Tutorial: 'a list of errors'
While browsing forums I stumbled upon this thread from Rasta about known errors in CoD4 Radiant and how to fix them, so I thought, what the hell, let's copy paste that.
ERROR
Fastfile 1 of 1, "mapname": [ver. 5] process...
Localization ERROR: Unable to load "localizedstrings/mapname.str"!
link...compress...save...done.
SOLUTION
Take out localizedstrings/mapname.str in Update Zone Files on the right and left side.
ERROR
Fastfile 1 of 1, "mapname": [ver. 5] process...
WARNING: Could not find 'maps/mapname.csv'.
link...compress...save...done.
SOLUTION
Go to "Update Zone File"
Enter "rawfile,maps/mp/mapname.csv"
Make sure your .csv is in the correct folder
Build you Fast File.
ERROR
Fastfile 1 of 2, "mp_building": [ver. 5] process...
ERROR: Could not open 'maps/mp/mp_building.gsc'
SOLUTION
amishthunder writes: Just tweak the mp_test.gsc to your map and save as mp_building.gsc
In case it is not there, here is what it contains...
Code:
ERROR
You made a change to your map and now everything is red and messed up.
SOLUTION
Update your Zone files. Make sure everything in the left column of your Zone Files window is also in the right column. Then recompile your FF file.
ERROR
My first multiplayer map won't load when I try to run it from the applications menu.
SOLUTION
Make sure there are no single player entities in the map, that you have named the map starting with 'mp_' and that you have add all 3 TDM spawn points (axis, allies and the other).
ERROR
My map looks good but my weapon and other models has a rainbow effect on it.
SOLUTION
You need to create a grid file. In the Compile tools on the Level Compiling window, the bottom right has the option to Start Grid. Perform this option and completely run through your level. Let the level complete on it's own and do not close it before it completes.
ERROR
Radiant crashes everytime i save my map when using Windows Vista
SOLUTION
Right click the CoD4 Radiant shortcut you made, in the drop down menu select 'run as administrator'.
ERROR
When I load my map it switches to backlot.
SOLUTION
When you start up your game without Compile tools, just type in '/sv_maprotation map mp_yourmapname' when you start with compile tools you should be fine.
ERROR
When I go to import xmodels and prefabs radiant crashes.
SOLUTION
None found at this time.
ERROR
Fastfile 1 of 1, "mapname": [ver. 5] process...
Localization ERROR: Unable to load "localizedstrings/mapname.str"!
link...compress...save...done.
SOLUTION
Take out localizedstrings/mapname.str in Update Zone Files on the right and left side.
ERROR
Fastfile 1 of 1, "mapname": [ver. 5] process...
WARNING: Could not find 'maps/mapname.csv'.
link...compress...save...done.
SOLUTION
Go to "Update Zone File"
Enter "rawfile,maps/mp/mapname.csv"
Make sure your .csv is in the correct folder
Build you Fast File.
ERROR
Fastfile 1 of 2, "mp_building": [ver. 5] process...
ERROR: Could not open 'maps/mp/mp_building.gsc'
SOLUTION
amishthunder writes: Just tweak the mp_test.gsc to your map and save as mp_building.gsc
In case it is not there, here is what it contains...
Code:
ERROR
You made a change to your map and now everything is red and messed up.
SOLUTION
Update your Zone files. Make sure everything in the left column of your Zone Files window is also in the right column. Then recompile your FF file.
ERROR
My first multiplayer map won't load when I try to run it from the applications menu.
SOLUTION
Make sure there are no single player entities in the map, that you have named the map starting with 'mp_' and that you have add all 3 TDM spawn points (axis, allies and the other).
ERROR
My map looks good but my weapon and other models has a rainbow effect on it.
SOLUTION
You need to create a grid file. In the Compile tools on the Level Compiling window, the bottom right has the option to Start Grid. Perform this option and completely run through your level. Let the level complete on it's own and do not close it before it completes.
ERROR
Radiant crashes everytime i save my map when using Windows Vista
SOLUTION
Right click the CoD4 Radiant shortcut you made, in the drop down menu select 'run as administrator'.
ERROR
When I load my map it switches to backlot.
SOLUTION
When you start up your game without Compile tools, just type in '/sv_maprotation map mp_yourmapname' when you start with compile tools you should be fine.
ERROR
When I go to import xmodels and prefabs radiant crashes.
SOLUTION
None found at this time.
Subscribe to:
Comments (Atom)